Project Master
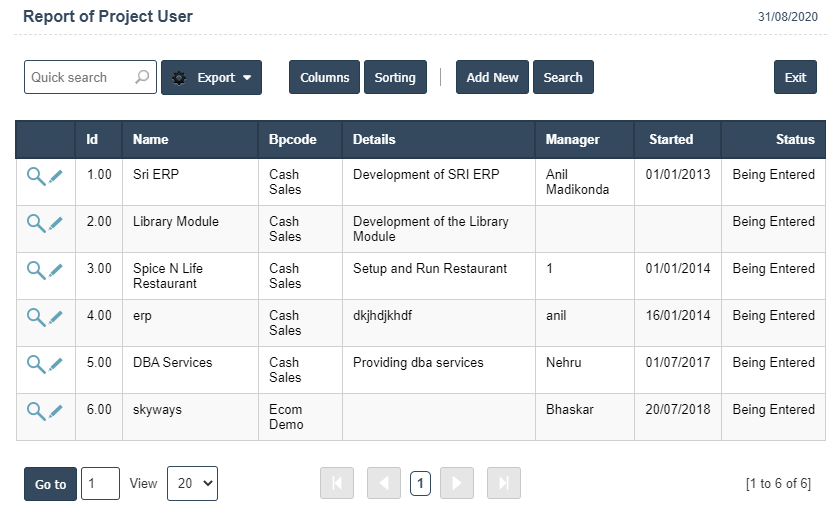
1. Go to the back-office and click on the option Project Management - Management and then click on the option Project Master.
2. To add a new Project Master click on the Add New Button as shown below.
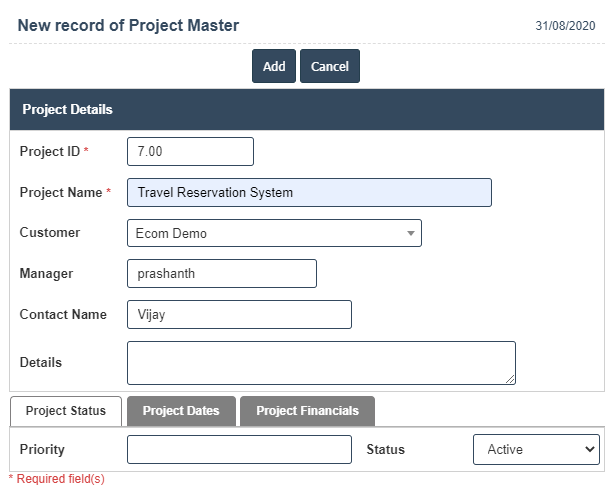
3. A New Project Master will open the new page and fill the details.
4. Fields in this Project Master Include:
- Project ID
- Project Name
- Customer
- Manager
- Contact Name
- Details.
5. Once you have completed the Project Master, clicking the Add button as shown below.