Assets Master
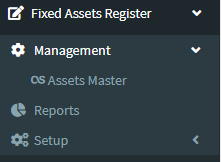
1.Go to the Back Office and click on the option Fixed Assets Register - Management and then click on the option Assets Master.
2.Add New : This Button is used for Adding New Assets Master.
3. In below image click on Add New Button then it will displays the following image

4. A New Assets Master will open the new page and fill the details.
5. Fields in this Assets Master Include:
- Id
- Name
- Type
- Location
- Serial No.
- Status.
6. Once you have completed Assets Master details, click the Add button as shown below.


7. Click on Properties button then click on Add New button.


8. After that Property Type and Property Value fill the details then click on


9. Click on Save button then details are saved.


